Enforcing MFA on AWS
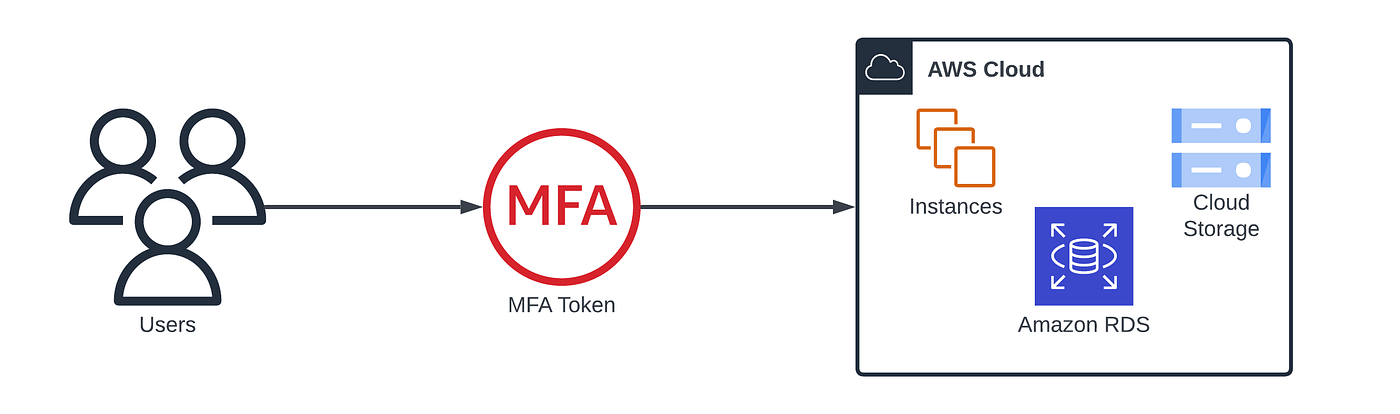
In today’s digital landscape, data breaches and security threats are an ever-present concern. Protecting sensitive information and resources is paramount, especially when it comes to cloud services like Amazon Web Services (AWS). To fortify your AWS environment and ensure that only authorized users have access, implementing Multi-Factor Authentication (MFA) is a critical step.
MFA adds an extra layer of security by requiring users to provide multiple forms of verification, typically something they know (like a password) and something they have (like a mobile device or security token). Enforcing MFA on AWS accounts is not just a recommended practice; it’s a necessity. Without MFA, your AWS account is vulnerable to unauthorized access and potential security breaches, making it crucial for businesses and individuals alike to protect their cloud resources.
In this blog, we’ll guide you through the process of enforcing MFA for users in AWS, ensuring that your account remains shielded from potential threats and unauthorized access. By the end of this tutorial, you’ll have a comprehensive understanding of how to implement MFA, bolstering your AWS security and safeguarding your valuable assets. We shall provide users access to their own user and deny them any other permissions to take action within the AWS account until they enable MFA. This method takes advantage of AWS’ permission logic.
Prerequisites
- Have an AWS account. If you don’t have one, sign up here and enjoy the benefits of the Free-Tier Account
- View project files in my GitHub portfolio
- This blog follows the steps outlined in the AWS General Immersion Day Advanced Modules — How to enforce users to register MFA
Create the “Allow Manage Own MFA Device” policy
- On the AWS console, search for ‘IAM’ on the services search box and select ‘IAM’ on the services that appear

2. On the Left navigation panel, expand ‘Access management’ and select ‘Policies’. Then click on ‘Crete policy’

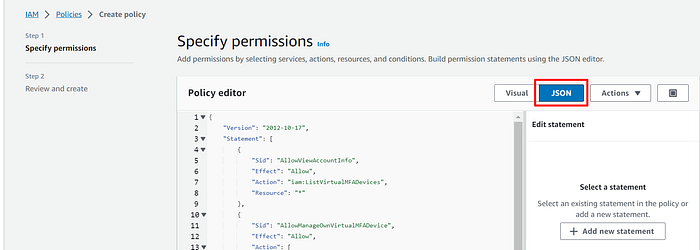
3. In the ‘Specify permissions’ page, select ‘JSON’ and paste the following policy in the ‘Policy editor’ space.
{
    "Version": "2012-10-17",
    "Statement": [
        {
            "Sid": "AllowViewAccountInfo",
            "Effect": "Allow",
            "Action": "iam:ListVirtualMFADevices",
            "Resource": "*"
        },
        {
            "Sid": "AllowManageOwnVirtualMFADevice",
            "Effect": "Allow",
            "Action": [
                "iam:CreateVirtualMFADevice",
                "iam:DeleteVirtualMFADevice"
            ],
            "Resource": "arn:aws:iam::*:mfa/*"
        },
        {
            "Sid": "AllowManageOwnUserMFA",
            "Effect": "Allow",
            "Action": [
                "iam:DeactivateMFADevice",
                "iam:EnableMFADevice",
                "iam:GetUser",
                "iam:ListMFADevices",
                "iam:ResyncMFADevice"
            ],
            "Resource": "arn:aws:iam::*:user/${aws:username}"
        },
        {
            "Sid": "DenyAllExceptListedIfNoMFA",
            "Effect": "Deny",
            "NotAction": [
                "iam:CreateVirtualMFADevice",
                "iam:EnableMFADevice",
                "iam:GetUser",
                "iam:ListMFADevices",
                "iam:ListVirtualMFADevices",
                "iam:ResyncMFADevice",
                "sts:GetSessionToken"
            ],
            "Resource": "*",
            "Condition": {
                "BoolIfExists": {"aws:MultiFactorAuthPresent": "false"}
            }
        }
    ]
}
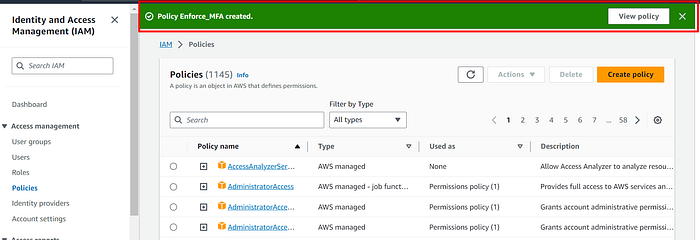
4. Click ‘Next’ at the bottom of the page
5. Give the policy a name then scroll to the bottom and click on ‘Create policy’

6. A confirmation notice appears at the top of the page once the policy has been created.
Create an IAM User
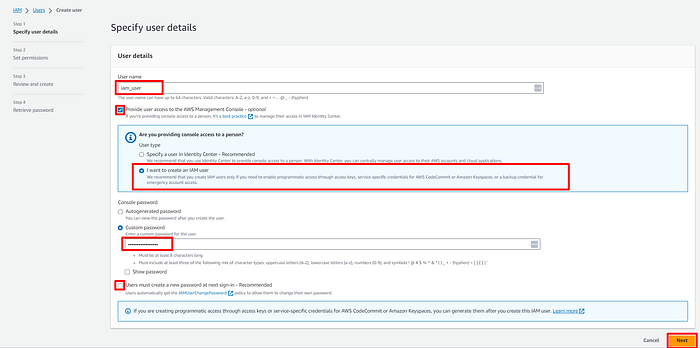
- On the IAM Console on the left navigation, select ‘Users’ in the ‘Access management’ section, then click on ‘Create user’

2. Enter a user name, provide the user access to the AWS Management console, Enter a custom password then click on ‘Next’ at the bottom
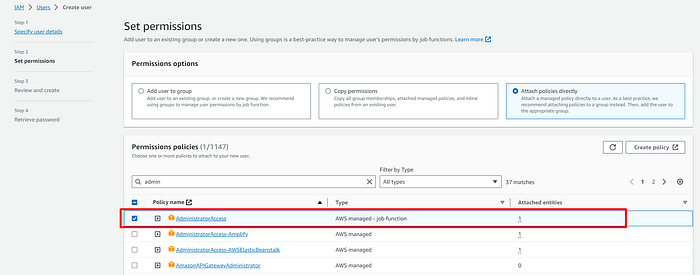
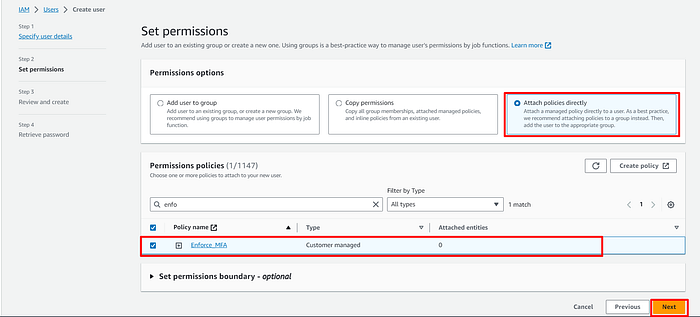
3. On the ‘Set permissions’ page, select ‘Attach policies directly’ under ‘Permissions options’ and under the ‘Permissions policies’, select the policy we created earlier. Also grant the user ‘AdministratotAccess’ Then click on ‘Next’ at the bottom.
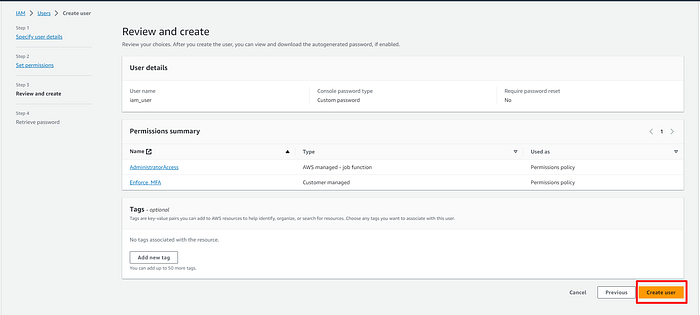
4. In the ‘Review and create’ section, click on ‘Create user’ at the bottom of the page
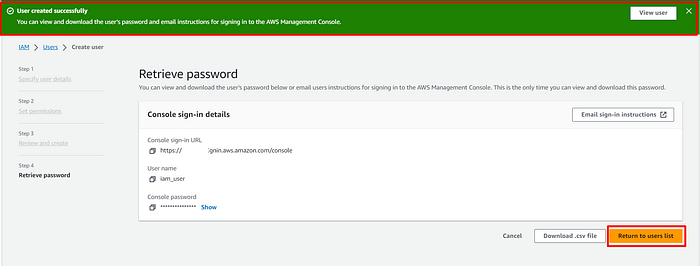
5. Once created, a notice appears at the top of the page with an ‘Retrieve password’ page which enables you to take note of the user’s credentials or download them if need be. When done, click on ‘Return to users list’
Sign-in to the AWS Console using the New User
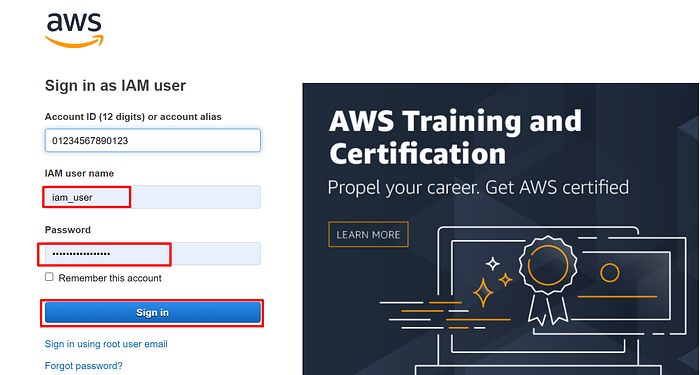
- Sign a new tab in in-cognito mode, or on another browser to avoid logging out of your account. On the sign in page, select ‘IAM user’ and enter your ‘Account ID’ in the space provided then click on ‘Next’

2. On the next page, enter the username and password that you ser then click on ‘Sign in’
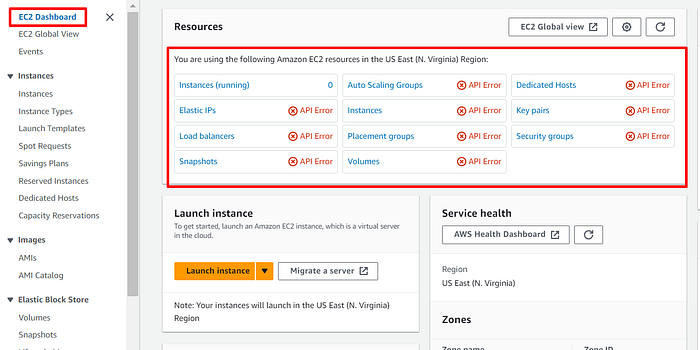
3. Select any of the services say ‘EC2’. Notice that the page resources show ‘API Error’ meaning that the user has no access
4. Navigate to the ‘IAM’ dashboard

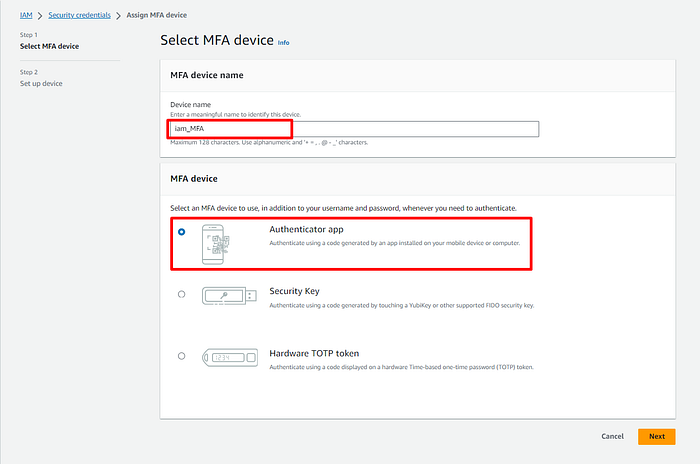
5. Note that access id denied on the user’s profile. Click on ‘Add MFA’

6. On the ‘Select MFA device’ page, enter a preferred device name then select your preferred MFA device. Click ‘Next’ at the bottom of the page
7. Install a compatible authenticator app. See a list of compatible applications
8. Scan the QR code using the app or use the secret key then enter 2 sequential codes from the authenticator app. Then click on

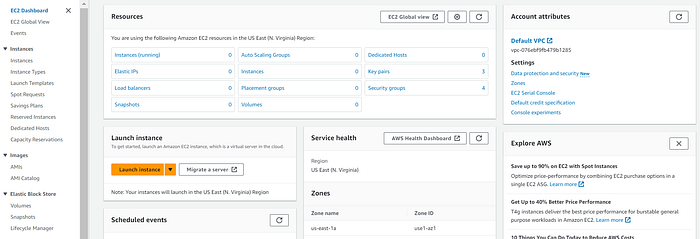
9. After MFA is activated, log out of the account than log in again.
10. You will notice that you now have access to the resources on the AWS account
Conclusion
In conclusion, implementing Multi-Factor Authentication (MFA) in your AWS environment is a fundamental step in enhancing your cloud security. By requiring users to provide additional layers of verification, you significantly reduce the risk of unauthorized access and data breaches. AWS offers a robust set of tools and policies to streamline the MFA enforcement process, as discussed in this blog. By following these steps, you not only protect your valuable resources and data but also demonstrate a commitment to maintaining the highest level of security. As threats evolve, staying ahead of the curve with MFA ensures that your AWS account remains resilient and your digital assets remain safeguarded.
