Deploy a Web Application on AWS using an Auto Scaling Group

This blog post provides a comprehensive guide to configuring a Virtual Private Cloud (VPC) and setting up various components within AWS. It covers essential tasks like creating a VPC, setting up VPC endpoints, launching a web server instance, creating custom AMIs, configuring an Application Load Balancer, and establishing an Auto Scaling Group. The post also delves into database setup, managing credentials with Secrets Manager, and enabling the web server to access these secrets securely. Follow this step-by-step guide to build a robust and scalable AWS environment while gaining insights into VPC configuration and application scaling.
Prerequisites
- Have an AWS account. If you don’t have one, sign up here and enjoy the benefits of the Free-Tier Account
- View project files in my GitHub portfolio
- This blog follows the steps outlined in the AWS General Immersion Day Advanced Modules — Web Application
VPC Configuration
- On the services search box, search for VPC, Click on the ‘VPC’ service that appears

2. On the VPC dashboard, click on ‘Create VPC’

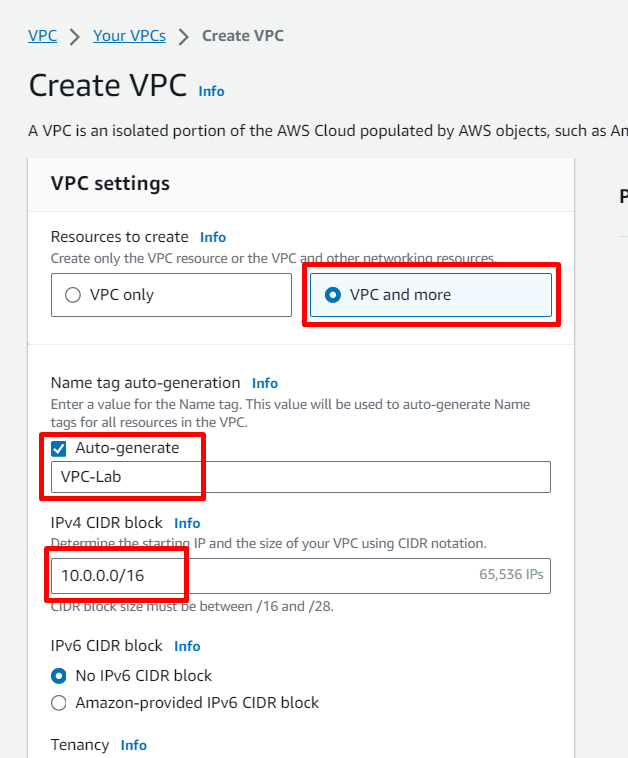
3. Configure the VPC as follows:
a. Resources to create — VPC and more
b. Name — VPC-Lab
c. IPV4 CIDR block — 10.0.0.0/16
d. Number of Availability Zones (AZs) — 2
e. Number of Public Subnets — 2
f. Number of Private Subnets — 2
g. Public subnet CIDR block for 1st subnet — 10.0.10.0/24
h. Public subnet CIDR block for 2nd subnet — 10.0.20.0/24
i. Private subnet CIDR block for 1st subnet — 10.0.100.0/24
j. Private subnet CIDR block for 1st subnet — 10.0.200.0/24
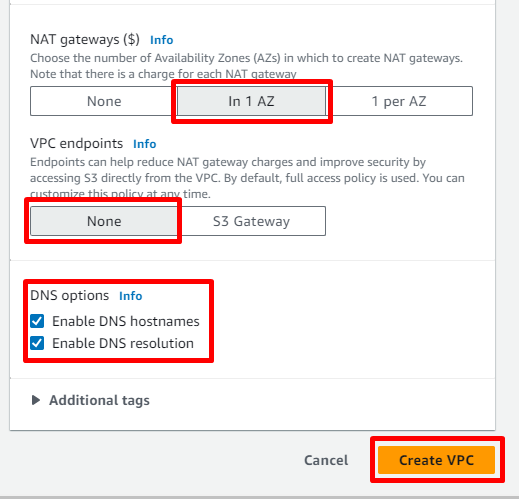
h. NAT Gateways — In 1 AZ
i. VPC endpoints — None
j. Enable DNS hostnames and Enable DNS resolution
h. Click ‘Create VPC’

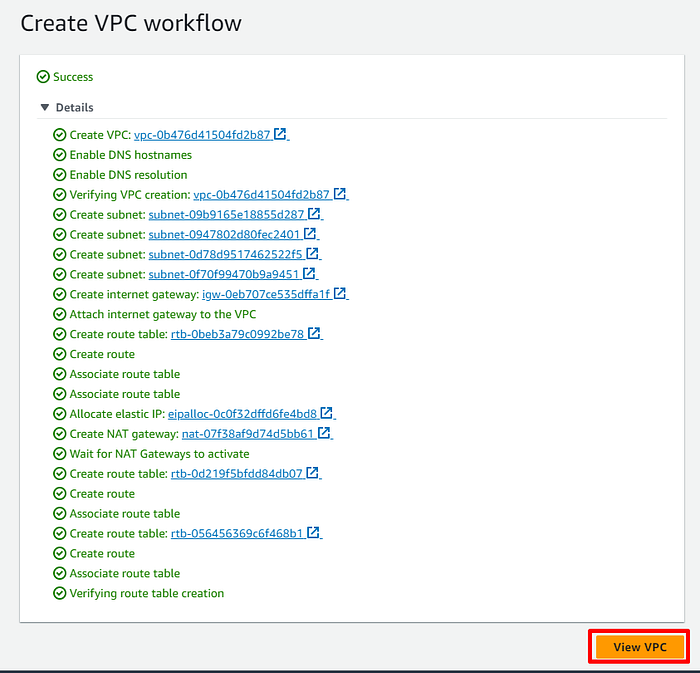
4. Wait for the VPC features to be created then click on ‘View VPC’ to view the resources
Create a VPC Endpoint
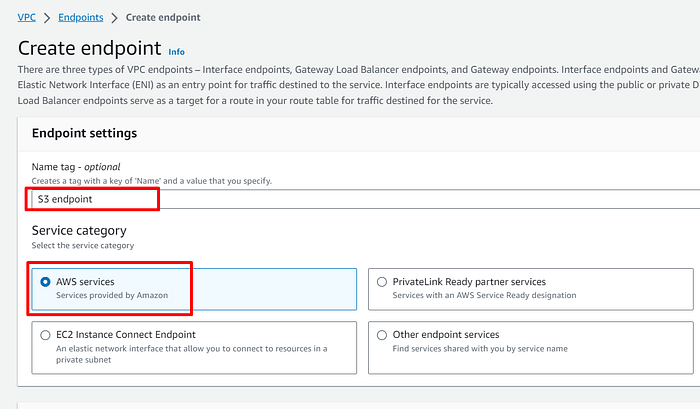
- On the VPC Dashboard, Click on ‘Endpoints’ on the left panel then click on ‘Create endpoint’

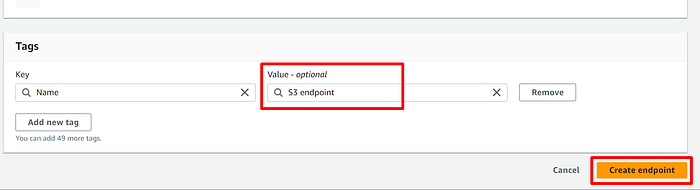
2. Give the endpoint a name : ‘S3 endpoint’
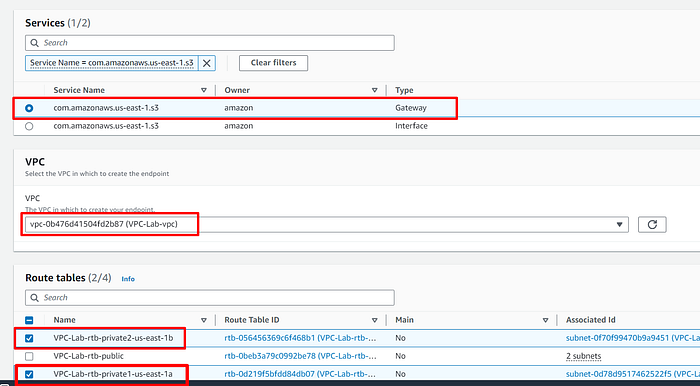
3. Select ‘AWS services’ under the Service category
4. Under services, search for ‘S3’ and select the Gateway with an S3 suffix
5. Select the VPC you created
6. Select the 2 route from your private subnets
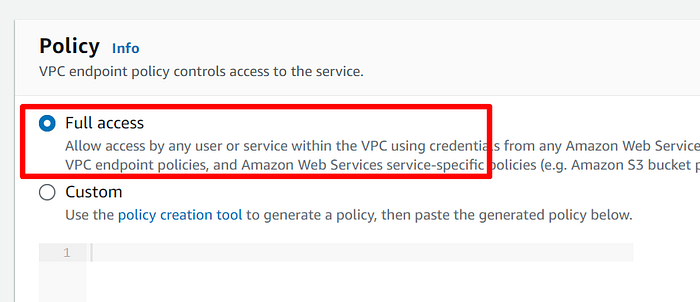
7. Select ‘Full access’ for the Policy
8. Confirm that the name is correct as you set it on Step 3 then click on ‘Create endpoint’
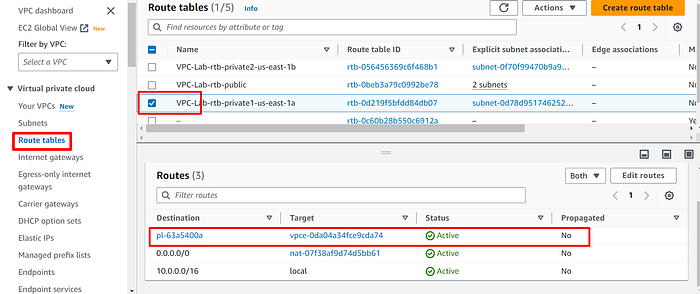
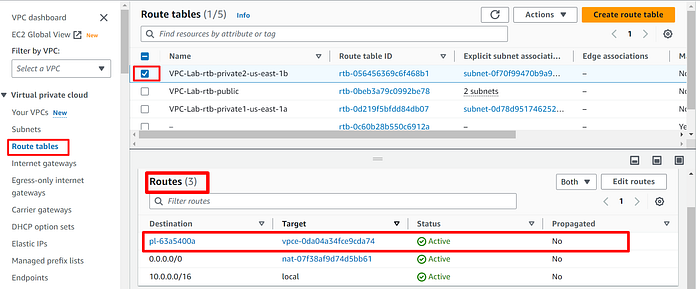
9. Confirm that the route to access Amazon S3 through the gateway has been automatically added to the private route table specified in step 6. Click on ‘Route Tables’ on the left panel and select the private route table. On the ‘Routes’ tab, you will see the route to access S3
Launch a Web Server Instance
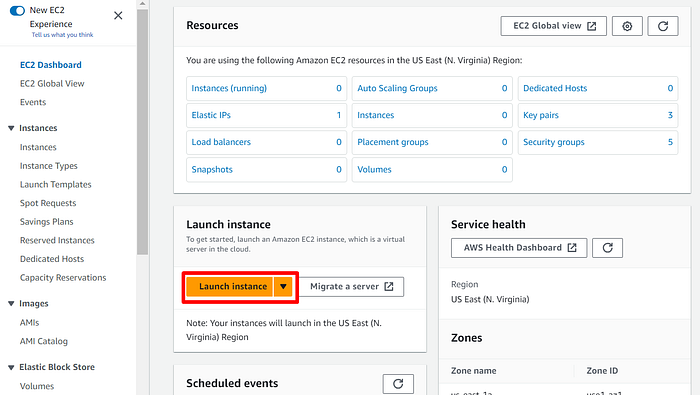
- On the services search box, search for ‘EC2’ and select the EC2 service that appears

2. Click on ‘Launch Instance’
3. Give the server a name a name and select the AMI

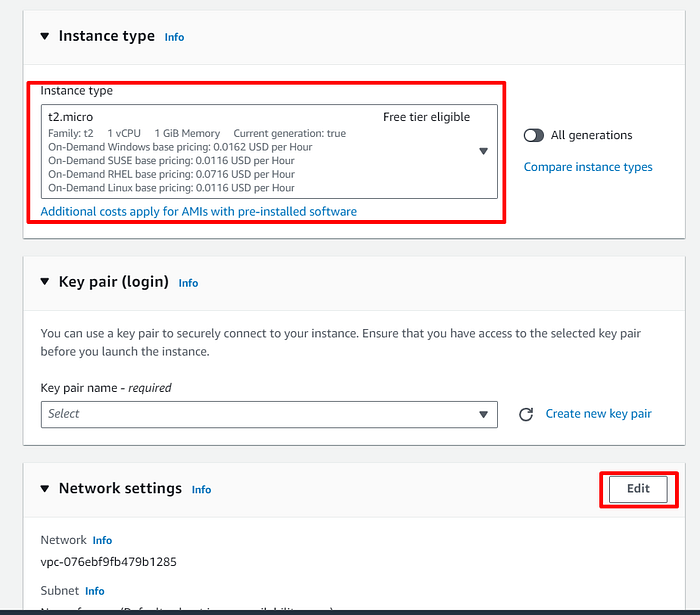
4. Select t2.micro for the instance (Choose the Free tier eligible instance in your region). Under Network settings, click on ‘Edit’
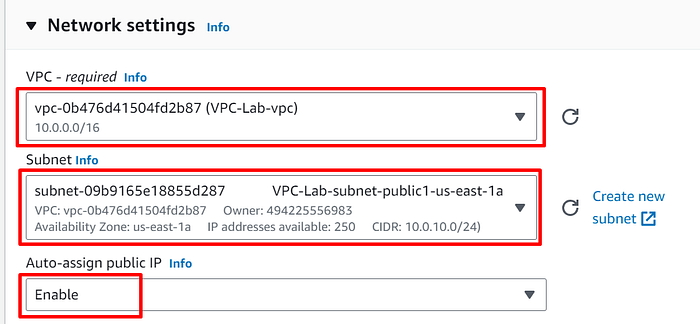
5. Select the VPC we created earlier (VPC-Lab). Select one of the public subnets and Enable Auto-assign IP
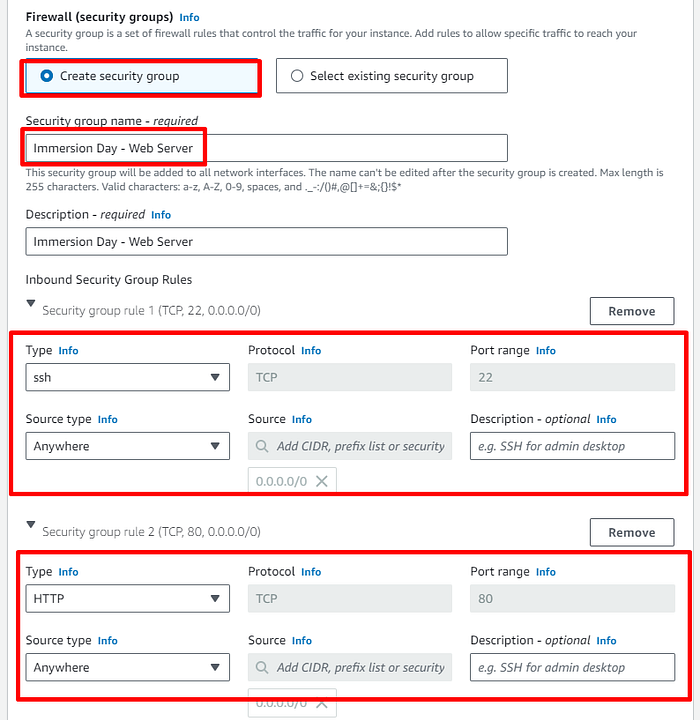
6. Create a new security group and call it ‘Immersion Day — Web Server’. Also allow SSH and HTTP for the security group
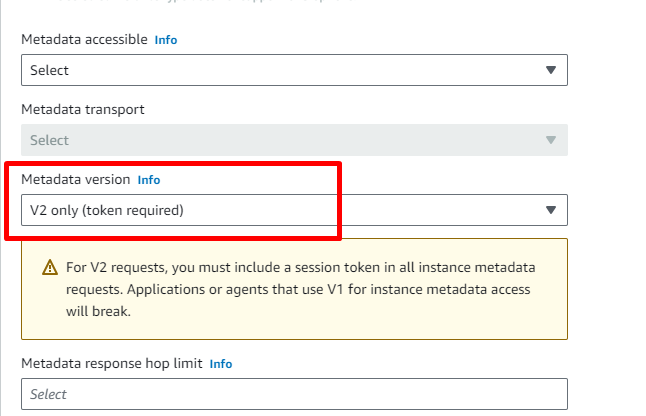
7. Scroll down and expand ‘Advanced details’. Under ‘Metadata version’ select ‘V2 only (token required)’
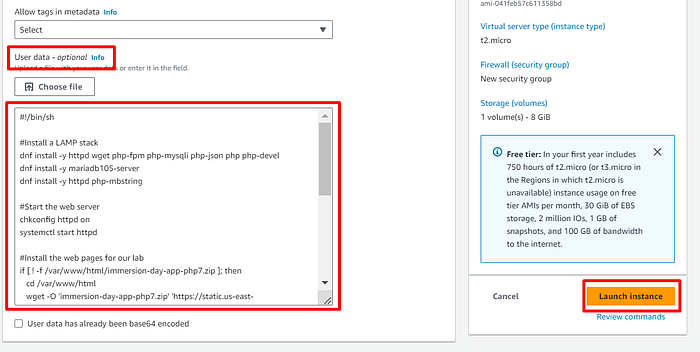
8. In the user data box, paste the following script
#!/bin/sh
#Install a LAMP stack
dnf install -y httpd wget php-fpm php-mysqli php-json php php-devel
dnf install -y mariadb105-server
dnf install -y httpd php-mbstring
#Start the web server
chkconfig httpd on
systemctl start httpd
#Install the web pages for our lab
if [ ! -f /var/www/html/immersion-day-app-php7.zip ]; then
cd /var/www/html
wget -O 'immersion-day-app-php7.zip' 'https://static.us-east-1.prod.workshops.aws/public/444df362-a211-4686-869b-77496f0dd3be/assets/immersion-day-app-php7.zip'
unzip immersion-day-app-php7.zip
fi
#Install the AWS SDK for PHP
if [ ! -f /var/www/html/aws.zip ]; then
cd /var/www/html
mkdir vendor
cd vendor
wget https://docs.aws.amazon.com/aws-sdk-php/v3/download/aws.zip
unzip aws.zip
fi
# Update existing packages
dnf update -y9. Click on ‘Launch instance’
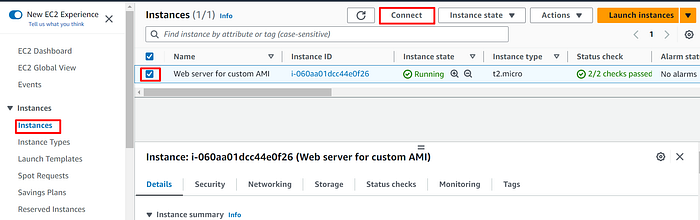
10. On the left panel, click on ‘Instances’ and you will see the created instance. When you select the instance, under the ‘Details’, see the external IP and Public IPv4 DNS

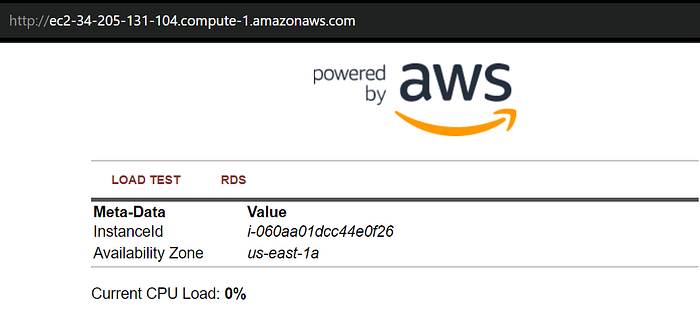
11. Open your IP Address or Public IPv4 DNS on a browser using HTTP and the Web app should load.
Connecting to the instance
- On the instances page, select the instance and click on ‘Connect’ at the top

2. Select the EC2 Instance Connect tab and click on ‘Connect’
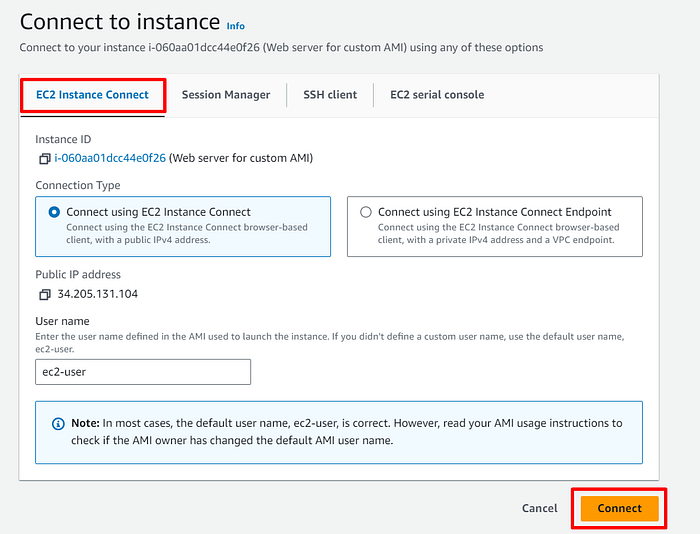
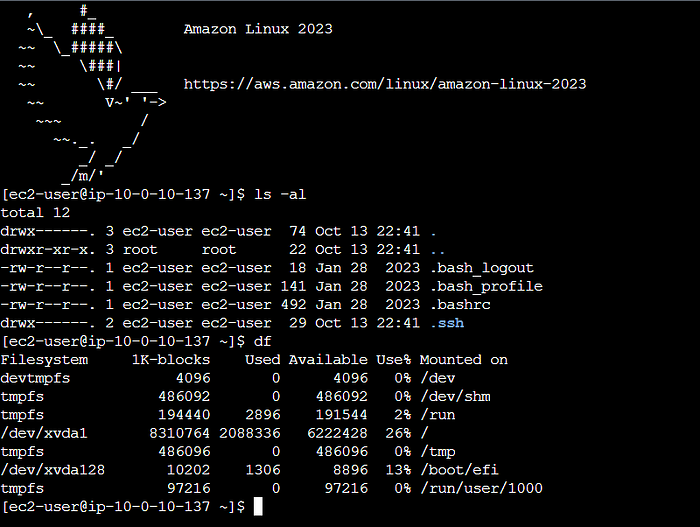
3. A terminal opens up on a browser where you can run commands on the instance
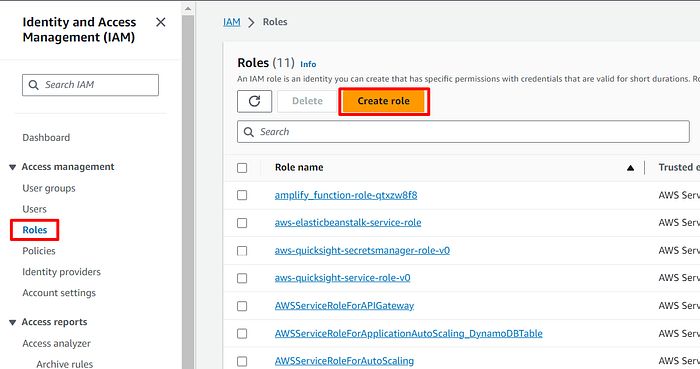
4. To connect to the instance through ‘Session Manager’ we need to create a role to grant the EC2 access to Session Manager(SSM)
5. On the IAM dashboard, click on Roles then click on ‘Create role’
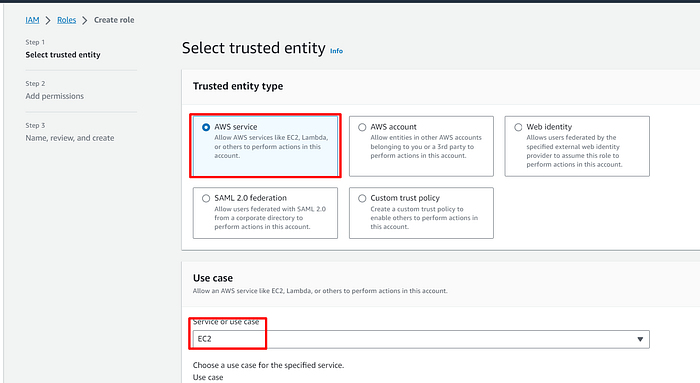
6. Select ‘AWS Service’ under ‘Trusted entity type’ and ‘EC2’ under use case and select ‘Next’ at the bottom of the page
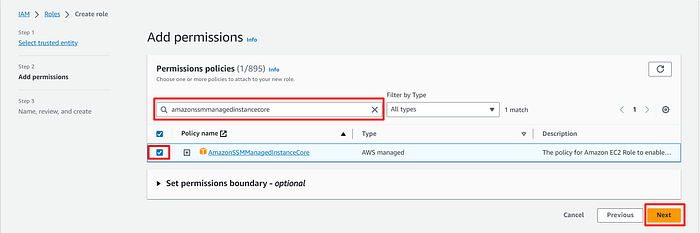
7. In the search box, search ‘AmazonSSMManagedInstanceCore’ and select the role that appears then click ‘Next’
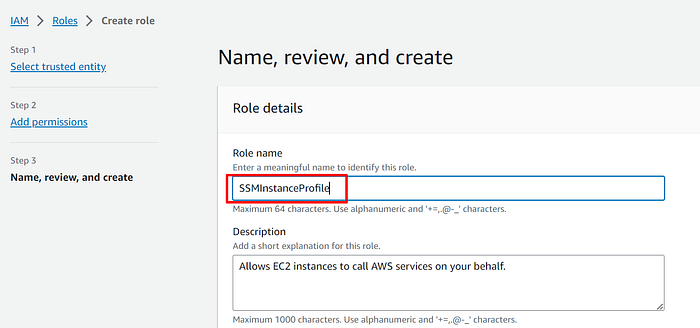
8. Give the role a name: ‘SSMInstanceProfile’, then scroll down and click on ‘Create role’
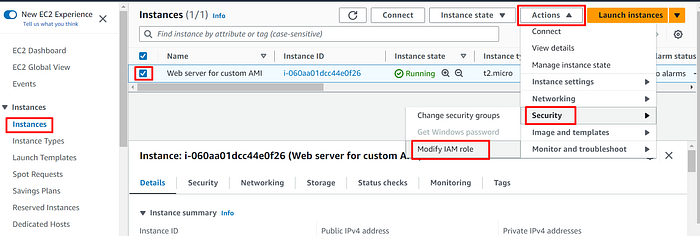
9. Move back to the EC2 dashboard and add the role to the instance.
10. Select the instance. On the ‘Actions’ drop down, expand ‘Security’ then select ‘Modify IAM role’
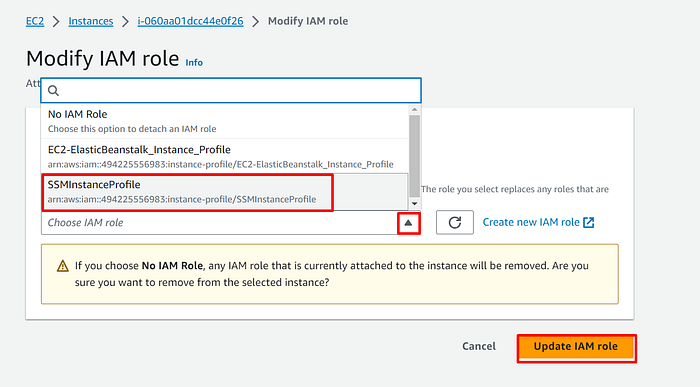
11. On the IAM role drop down, select the ‘SSMInstanceProfile’ role then click on ‘Update IAM role’
12. On the instances page, select the Instance then ‘Connect’ at the top
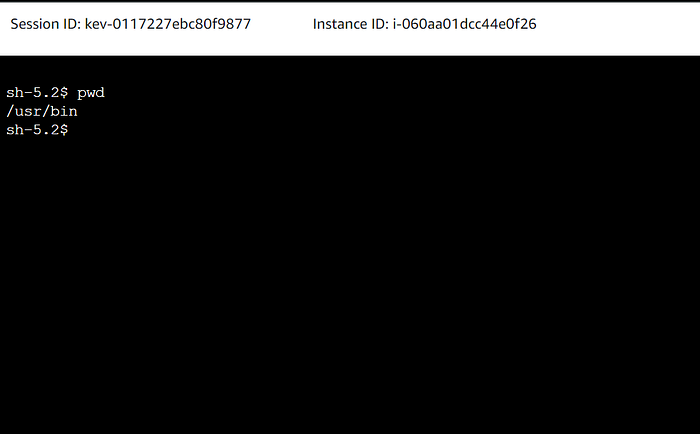
13. Select the Session Manager tab and click on ‘Connect’

14. A terminal opens up on the browser and you can run commands on the instance via the terminal
Create a Custom AMI
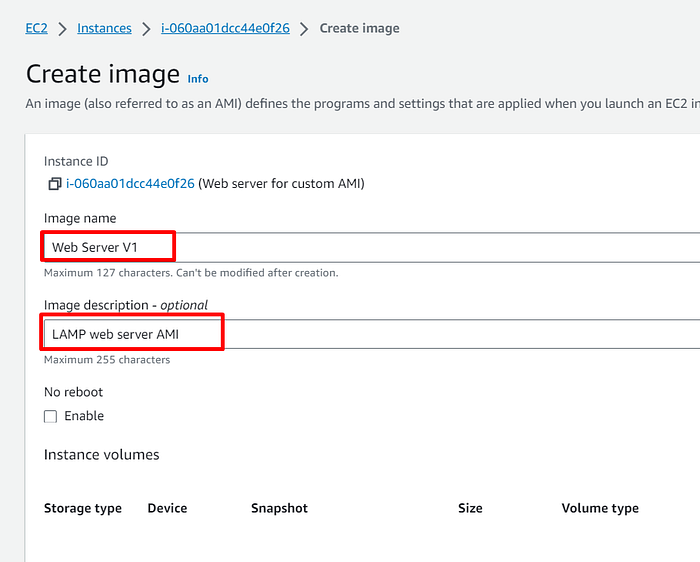
- On the EC2 Console, Click on Actions > Image and templates > Create image

2. Give the image a name and description. Scroll down to the bottom and click ‘Create image’
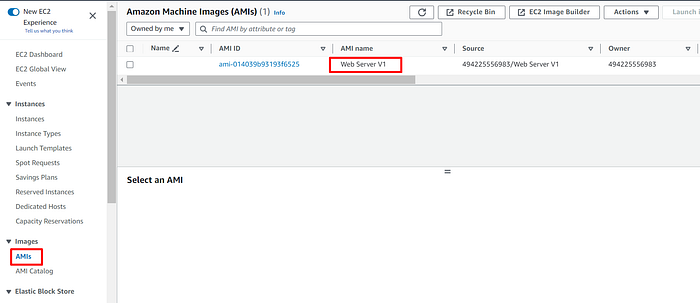
3. On the left navigation panel, click on AMIs and you should see the created AMI
Configure Application Load Balancer
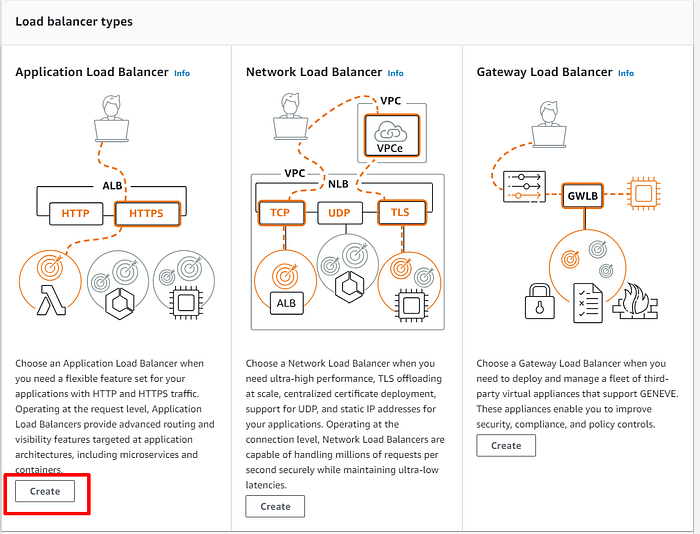
- On the EC2 management console, select ‘Load Balancers’ under ‘Load Balancing’. Then click on ‘Create load balancer’

2. Click on ‘Create’ under ‘Application Load Balancer’
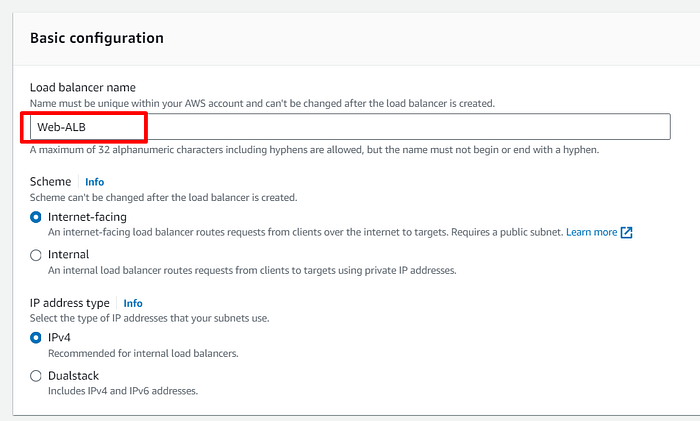
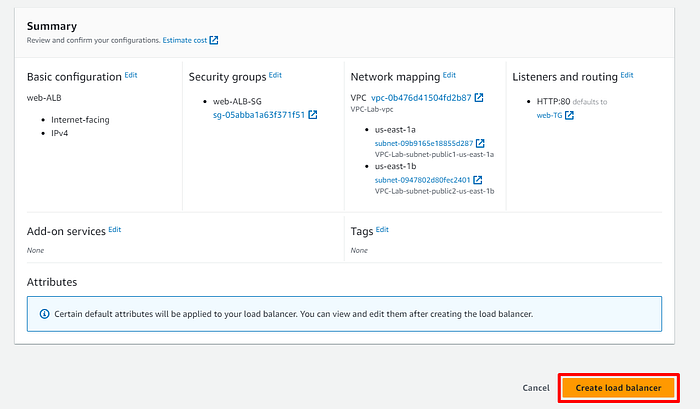
3. Give the load balancer a name: ‘Web-ALB’
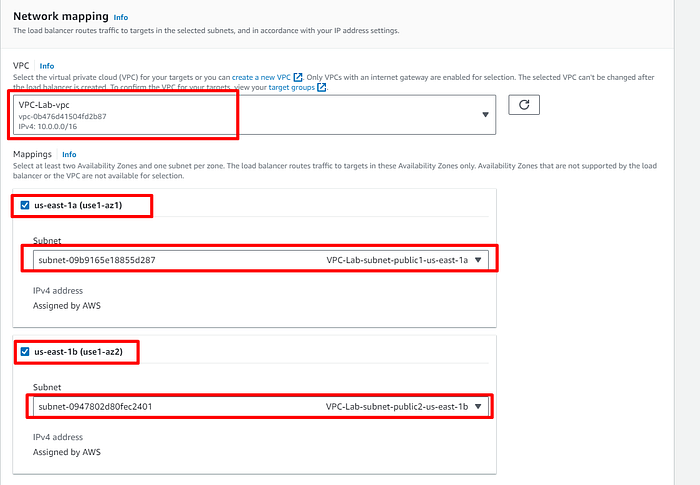
4. Under Networking mapping, select the Lab-VPC under VPC and select the 2 AZs and public subnets
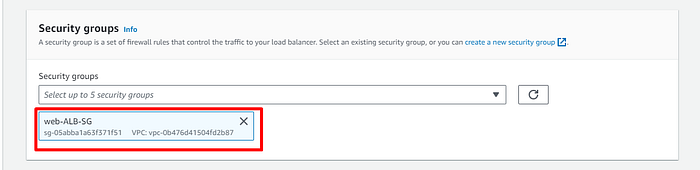
5. Create a new Security group to allow HTTP and save it as ‘web-ALB-SG’
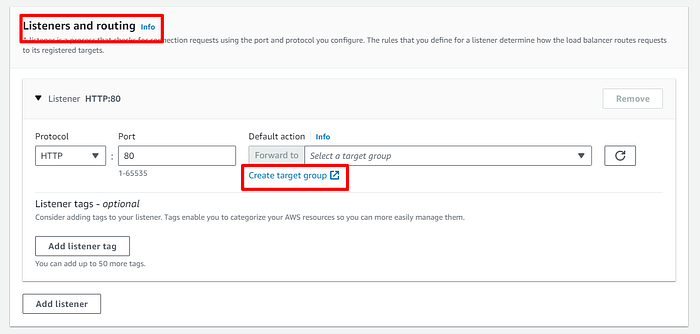
6. Under the ‘Listeners and routing’ section, click on ‘Create target group’
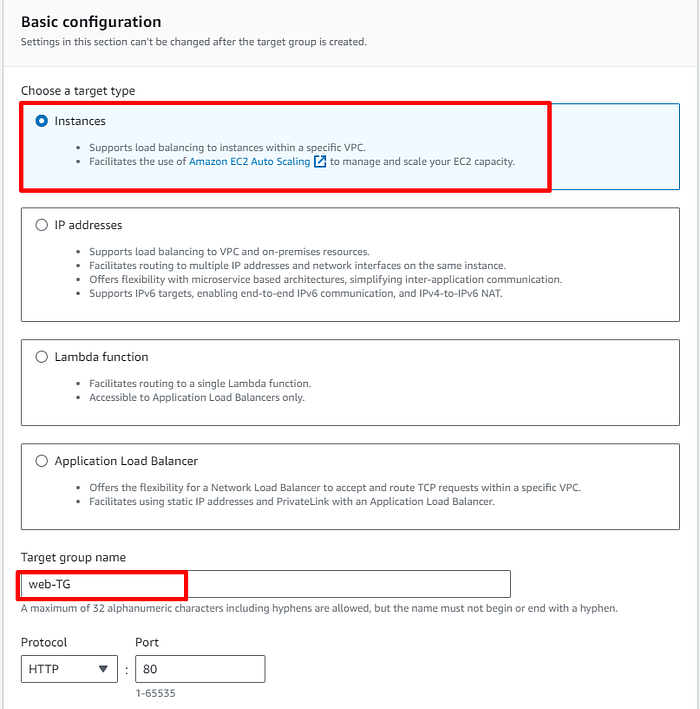
7. Under target type, select ‘Instances’ and give thw target group a name
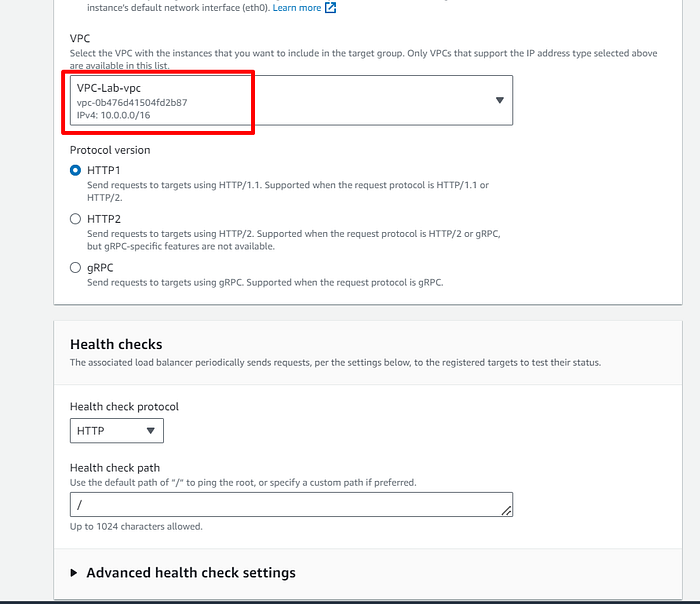
8. Under VPC, select ‘Lab-VPC’
9. At the bottom, click ‘Next’
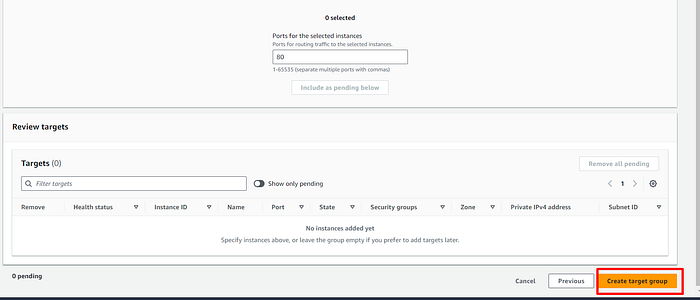
10. As we do not have instances that we widh to add to the target group for now, click ‘Create target group’
11. On the ‘Load balancers’ page, reload the ‘Listeners and routing’ section, select the web-TG target group

12. Review the summary and click on ‘Create load balancer’ at the bottom
Configure Launch Template to create an Auto Scaling Group
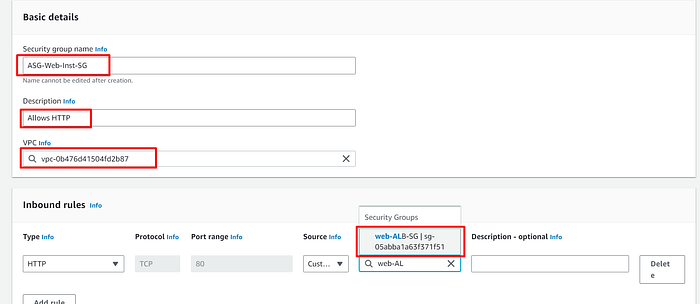
- Create a security group to allow HTTP traffic. On the EC2 console, on the left navigation panel under the Network and Security, click on Security Groups >> Create security group

2. Set the name, description and select LAB-VPC as the VPC. Under inbound rules, allow HTTP from the web-ALB-SG security group. Scroll down and click on ‘Create security group’
Create Launch Template to launch Auto-Scaling group
- On the EC2 console, on the left navigation panel, under ‘Instances’ click on ‘Launch Templates’ then select “Create launch template’

2. Under ‘Create launch template’, give it a name, description and Check for auto scaling guidance

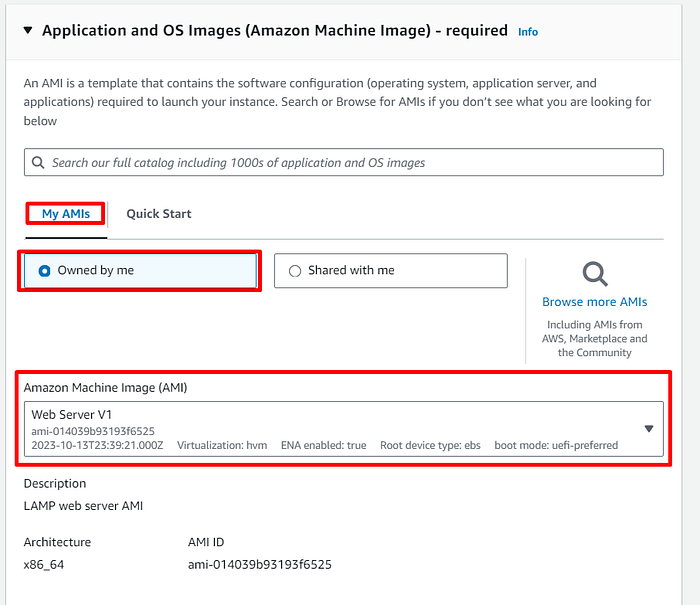
3. Scroll down to ‘Application and OS Images’, Click on ‘My AMIs’ then ‘Owned by me’. Under Amazon Machine Image, select ‘Web Server V1’
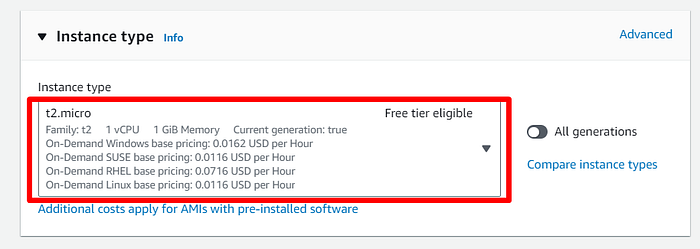
4. Under instance type, select the Free tier eligible instances in your region
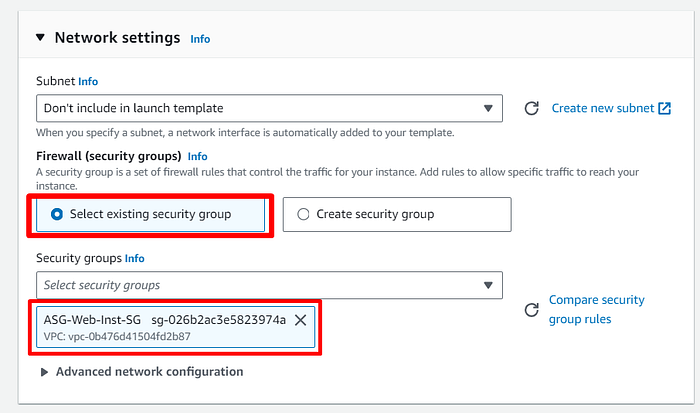
5. Under ‘Network settings’, select existing security group and select the Auto-Scaling group security group
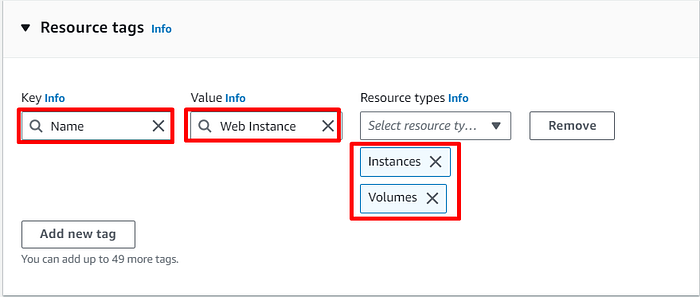
6. Under Resource tags, Click ‘Add Tag’ Set ‘Name’ as Key and ‘Web Instance’ for the value. For the Resource types add Instances and Volumes
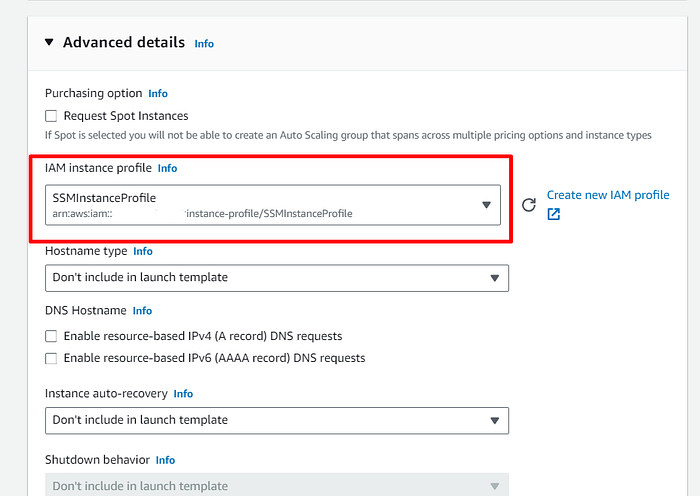
7. Under ‘Advanced details’ Select the ‘SSMInstanceProfile’ under the IAM instance profile
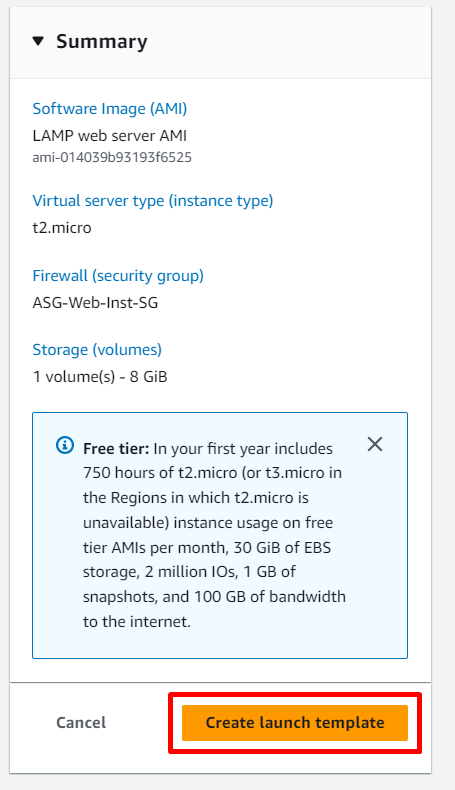
8. Confirm the summary information then click on ‘Create launch template’
Set Auto Scaling Group
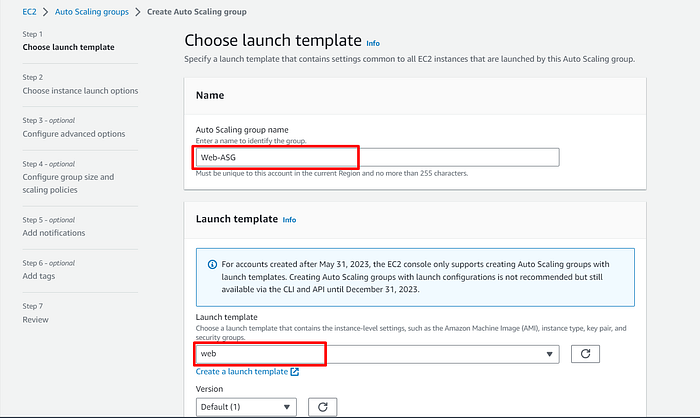
- On thee EC2 dashboard, on the left navigation panel, under ‘Auto Scaling’ select ‘Auto Scaling Groups’ and click on ‘Create Auto Scaling group’

2. On the ‘Choose launch template’ page, enter a name for the Auto Scaling Group name and select the ‘web’ launch template. Scroll down and click on ‘Next’
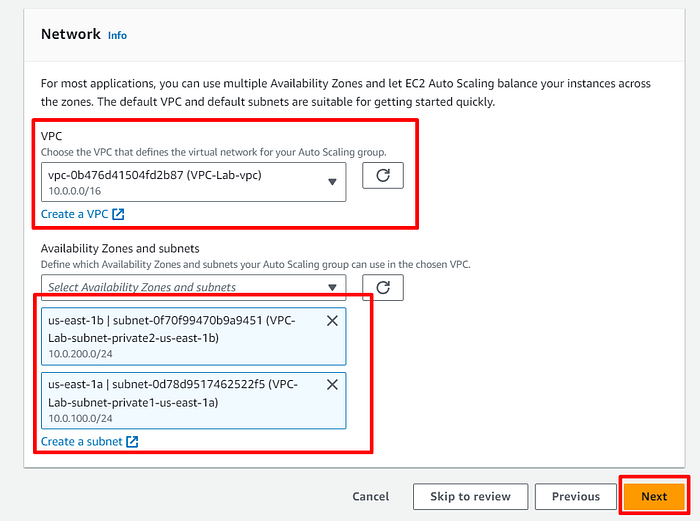
3. Under Network, For the VPC, select Lab-VPC. For the Availability Zones and subnets, select the Private subnets. Click on ‘Next’
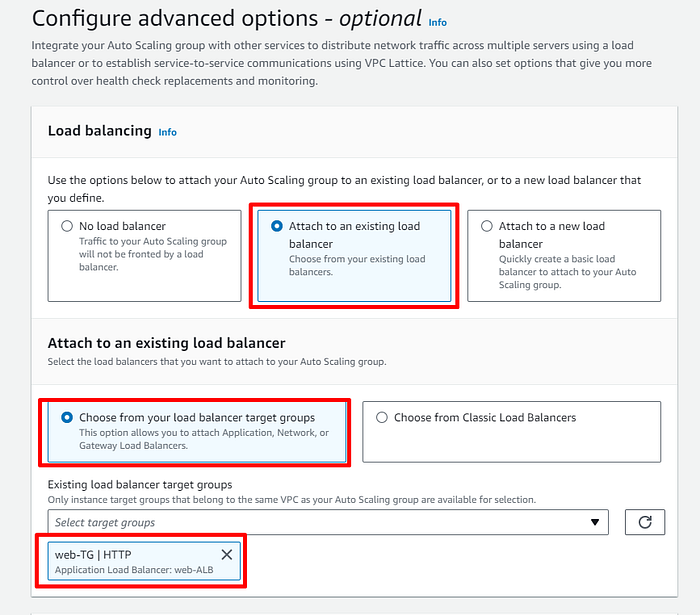
4. Under Load balancing, select ‘Attach to an existing load balancer’. Choose the web-TG load balancer we created earlier
5. Scroll to the bottom under ‘Additional settings’ and ‘Enable group metrics collection within CloudWatch’. Click on ‘Next’

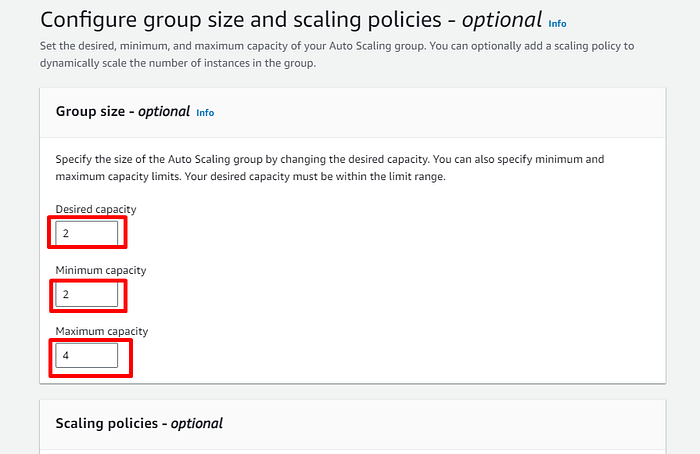
6. Configure group size and scaling policies: Set Desired capacity: 2, Minimum capacity: 2, Maximum: 4
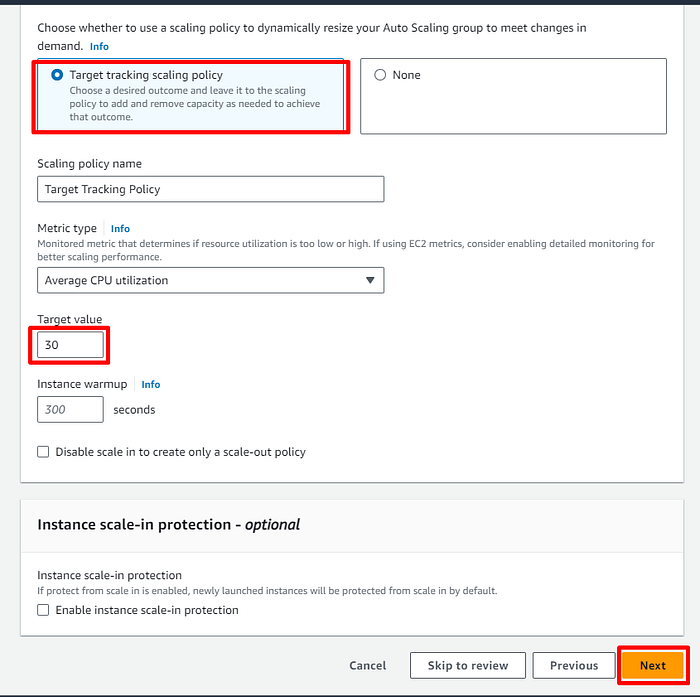
7. For the Scaling policies, select ‘Target tracking scaling policy’ and select Average CPU utilization and set the target value as 30, then click ‘Next’ at the bottom.
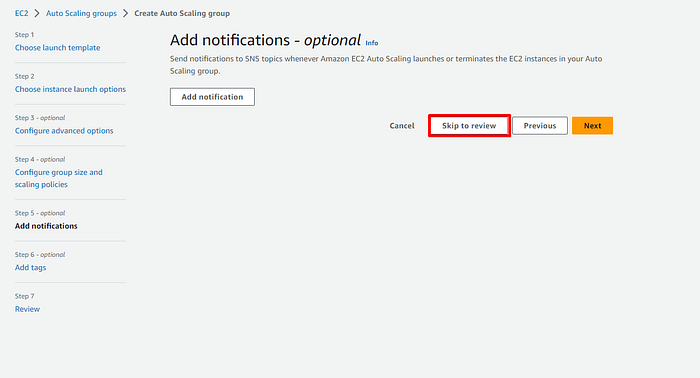
8. Click on ‘Skip to review’
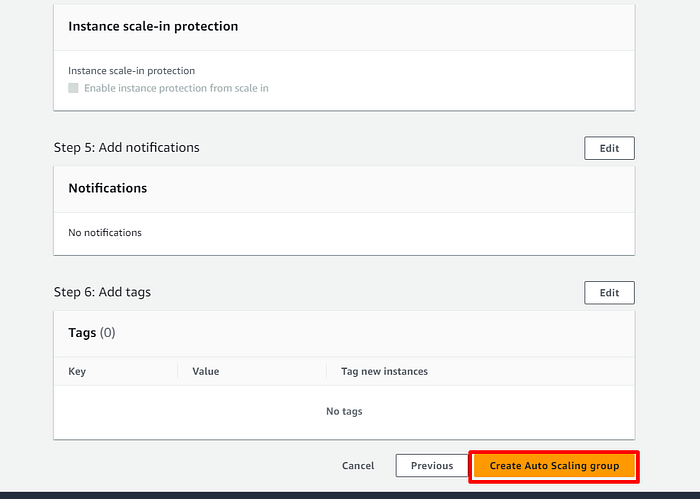
9. On the ‘Review’ page, click on ‘Create Auto Scaling group’
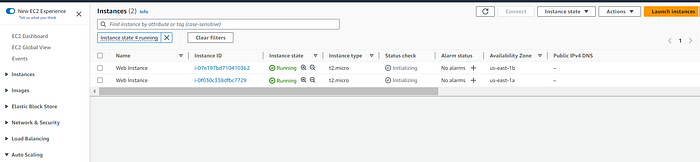
10. Confirm that your instances are started on the EC2 console
Check Web service and Load Balancer
- On the EC2 dashboard, under Load Balancing, select ‘Load Balancers’. Select the web-ALB load balancer and copy the DNS name under its details

2. Paste the DNS name on a browser tab and load the page
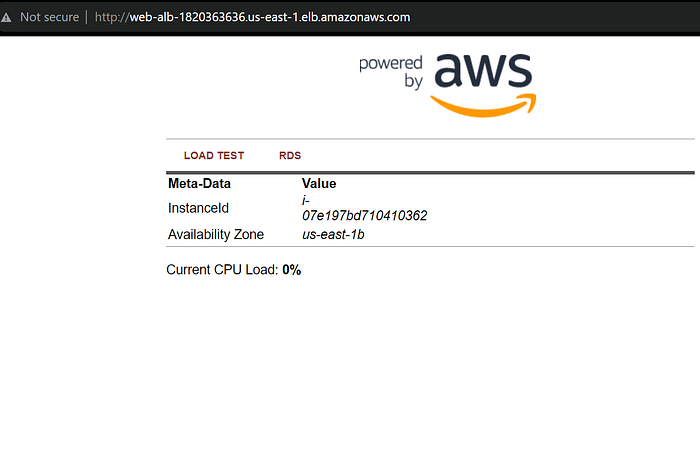
3. Currently, the load is at 0%, lets increase the load to test the Auto Scaling Group. Click on ‘LOAD TEST’ on the app
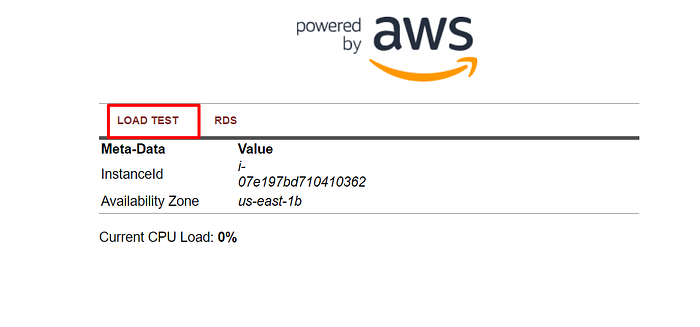
4. The CPU Load changes to 100%

5. On the EC2 console page, click on ‘Auto Scaling Groups’ under ‘Auto Scaling’. Select the ‘Web-ASG’, select ‘Monitoring’ and under ‘EC2’, note that the CPU Utilization shows a spike
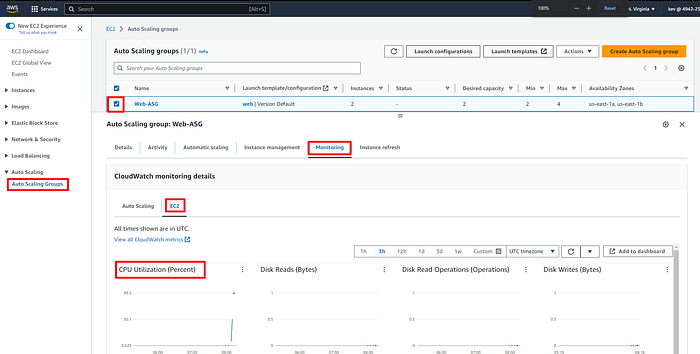
6. On the Running Instances dashboard, note that there are 4 instances running

Set up a Database
Create a VPC Security Group for the Database
- On the VPC dashboard, on the Left navigation panel, select ‘Security groups’ under ‘Security’ and click ‘Create security group’

2. Give the security group a name, description and select the LAB-VPC

3. Under the Inbound rules, select ‘MYSQL/Aurora’ and make the source the Auto scaling group security group. Then scroll down and click on ‘Create security group’

Create RDS instance
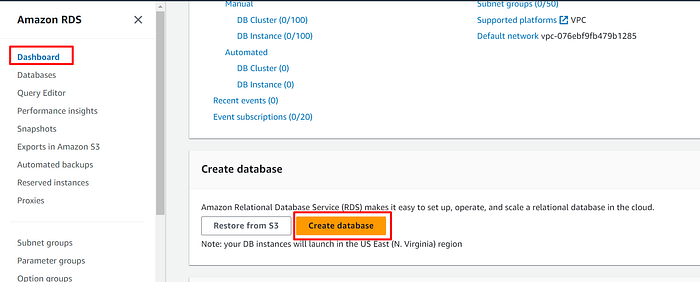
- On the AWS Management console., search for ‘RDS’ and select the RDS Service

2. On the RDS dashboard, click on ‘Create database’
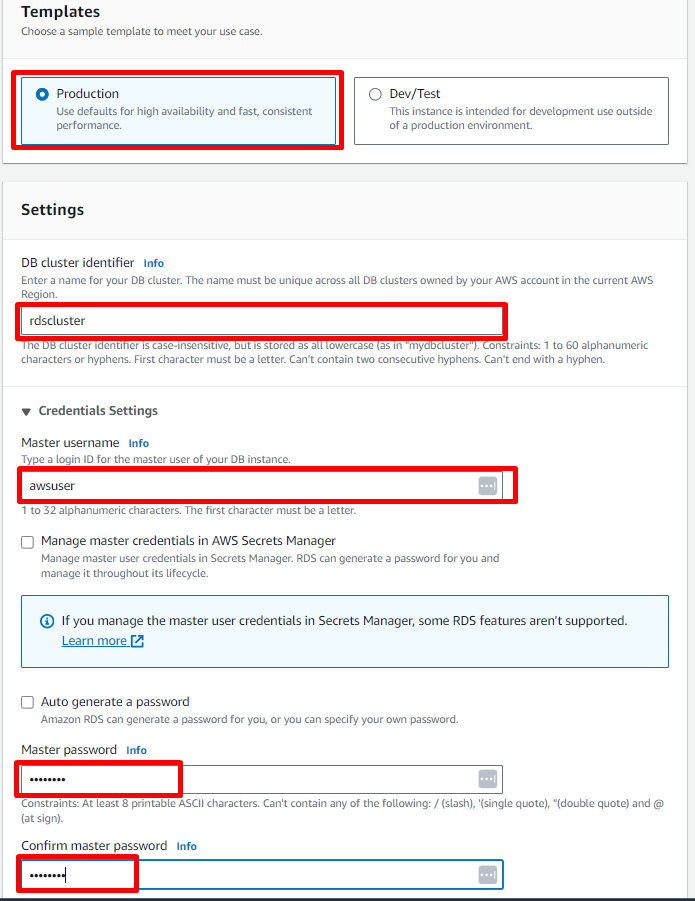
3. On the creation method, choose ‘Standard create’ and for the Engine options, choose ‘Aurora’

4. Choose the Production template, give the db cluster an identifier and set the credentials
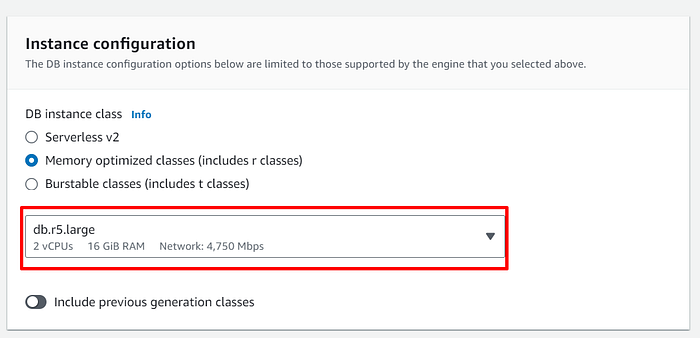
5. Set the instance configuration
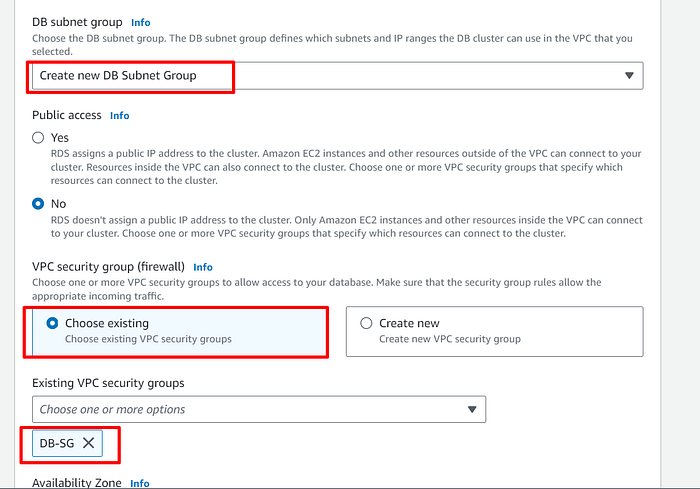
6. Under connectivity, select the ‘LAB-VPC’

7. Create a new DB Subnet Group and select the DB-SG Security Group
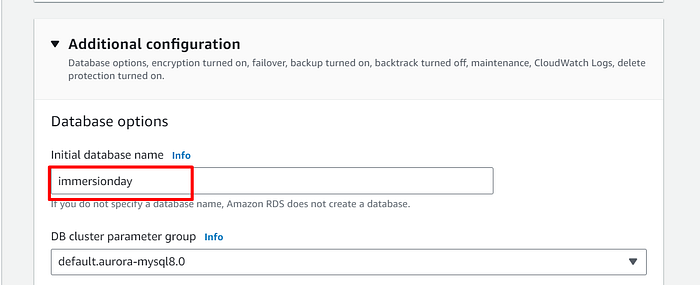
8. Under the Additional configuration, give the database an initial name and scroll to the bottom and click on ‘Create database’
Manage the Database Credentials with Secrets Manager
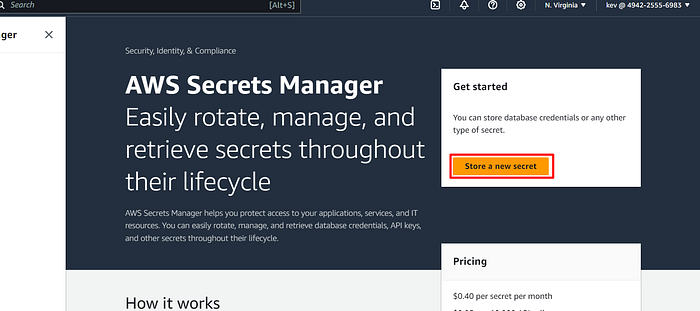
- On the AWS Console search for Secrets Manager and select it

2. Click on Store a new secret
3. Select ‘Credentials for Amazon RDS’ and enter the credentials you created when creating the database
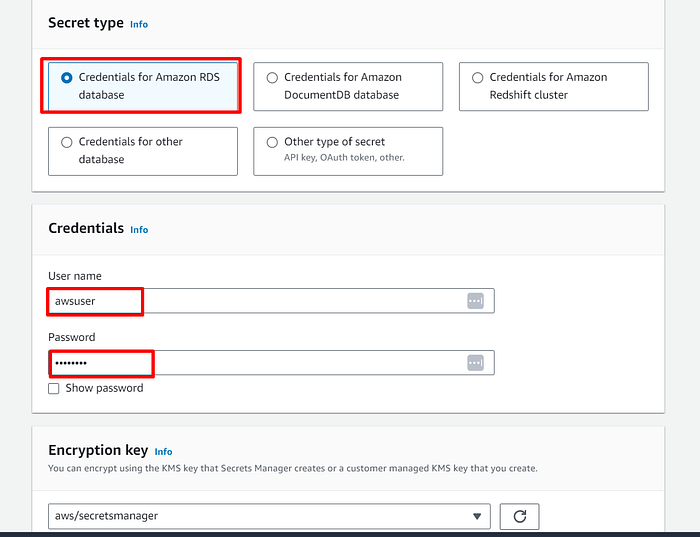
4. Under the Database, select the rdscluster database then click on ‘Next’ at the bottom

5. Give the secret a name and click on ‘Next’ at the bottom
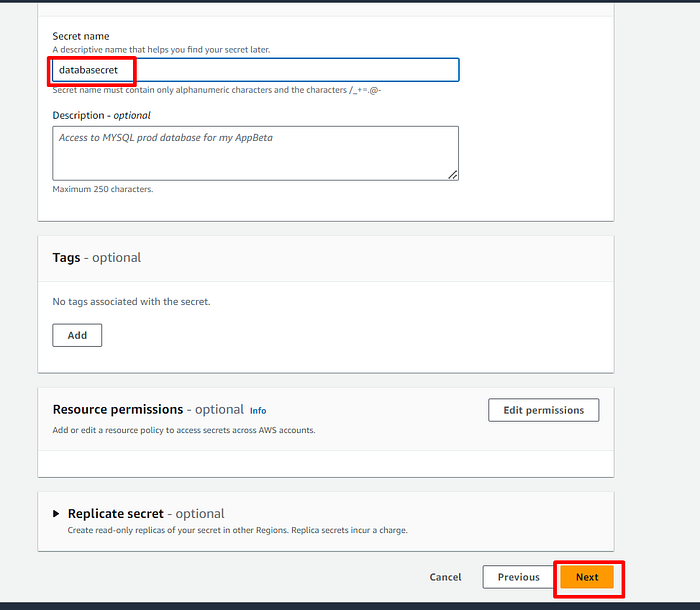
6. On the rotation, maintain the default and click on ‘Next’ to go to the Review page and click on ‘Store’ at the bottom
7. You can now see the secret on the Secrets page. Click on the name
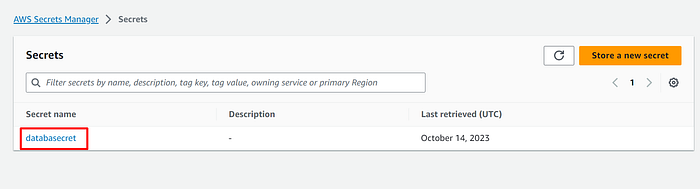
8. Under ‘Secret value’, click on ‘Retrieve secret value’
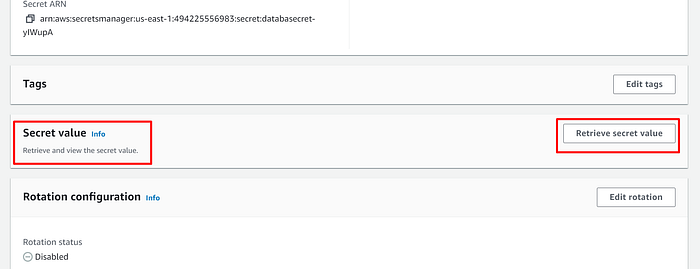
9. Confirm that there is ‘dbname’ and ‘immersionday’ in the key/vale section. If not, click on ‘Add row’ and add it and click ‘Save’

Allow the Web Server to access the secret
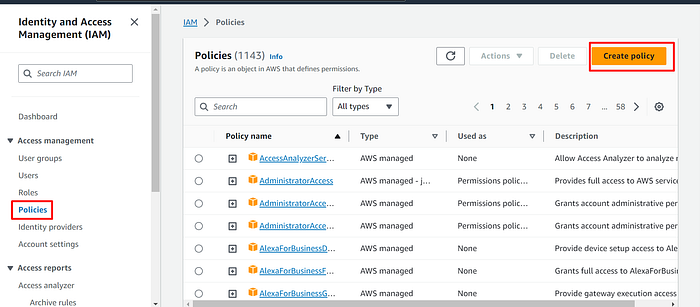
- Open the IAM console from the AWS dashboard

2. On the left navigation plane, select ‘Policies’ then click on ‘Create policy’
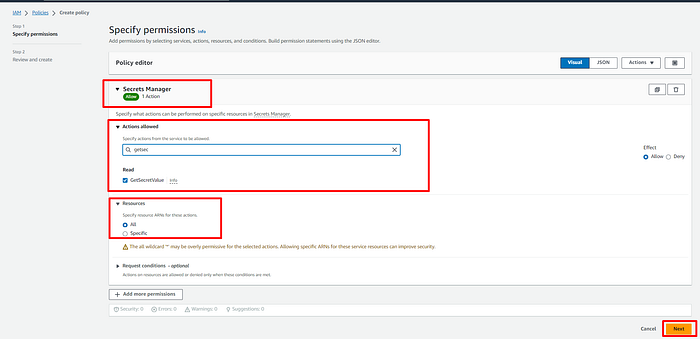
3. Under services, select ‘Secrets Manager’. Under Actions, allow for ‘GetSecretValue’. Under Resources, select ‘All’, then click on ‘Next’ at the bottom
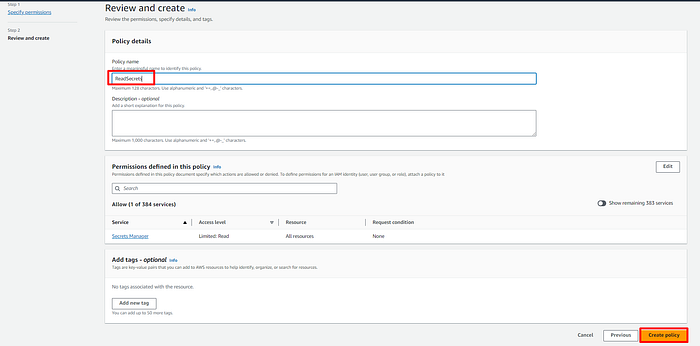
4. On the ‘Review’ Page, give the policy a name and click on ‘Create Policy’ at the bottom
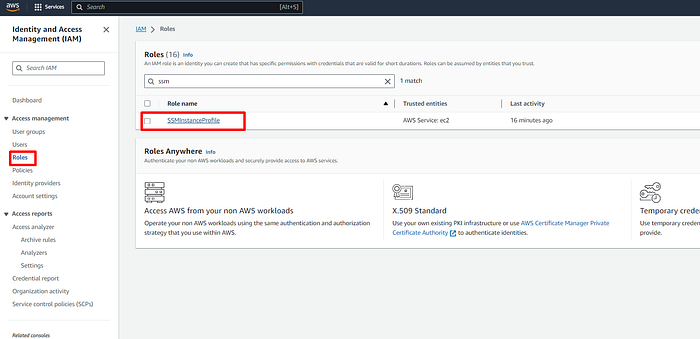
5. On the IAM dashboard, click on ‘Roles’ on the navigation plane and select the ‘SSMInstanceProfile’ that we attached to the EC2 instances
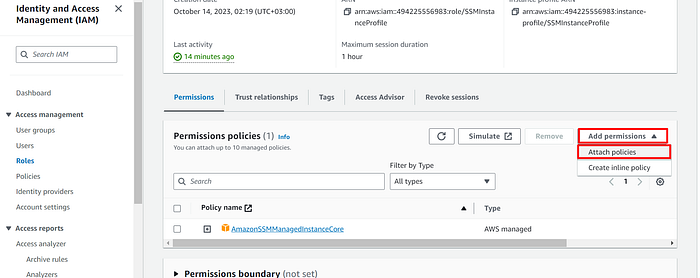
6. Under Permissions policies, on the Add permissions drop down, click on ‘Attach policies’
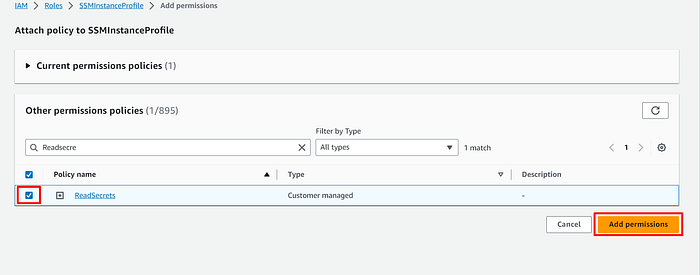
7. On the search box, search for the policy we created and select it. Then click ‘Add permissions’
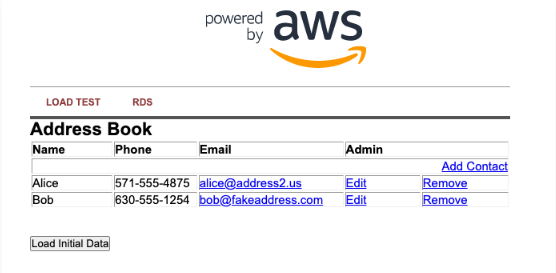
8. Load the Load-balancer DNS and click on ‘RDS’
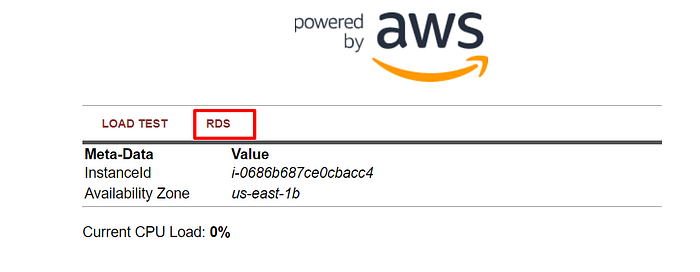
9. See the database details to assert connection
Clean-up
- Delete DB Cluster
- Delete the Amazon RDS Snapshot created during the lab
- Delete the secret in AWS Secrets Manager
- Delete the Auto-scaling group
- Delete the Application Load Balancer
- Delete the Target Group
- Delete the EC2 AMI
- Delete EC2 snapshots
- Delete the Launch template
- Delete VPC endpoints
- Delete NAT Gateway
- Delete Elastic IP Address
- Delete Security Groups
- Delete created VPC
Conclusion
By following the steps outlined in this blog post, you’ve successfully set up a secure and scalable AWS environment. You’ve created a VPC, launched web server instances, configured load balancing, and established an Auto Scaling Group. Additionally, you’ve set up a database and managed its credentials with Secrets Manager, ensuring the utmost security. These essential AWS tasks have equipped you with the knowledge and skills to build, manage, and scale your cloud infrastructure effectively, empowering you to meet the demands of your applications and services with ease.